• Skip to primary navigation
  • Skip to main content
  • PRICE LISTS
    • PRICE LIST: NAILS
    • PRICE LIST: MAKE-UP
  • CONTACT
  • SHOP
  • TESTIMONIALS
  • FAQ
    • Nails FAQ
    • Make-up FAQ
  • T&Cs
    • Refund and Returns Policy
    • Terms & Conditions
  •  
  • Nav Social Menu

    • Facebook
    • Instagram
    • Pinterest

Rambling Rose

  • Price Lists
    • Nails
    • Make-up
  • Shop
  • Blog
    • Articles
    • How to … & Tutorials
    • Make-up brushes & tools
    • Nails
    • Product Reviews
  • Contact
  • T&Cs
    • Refund and Returns Policy
    • Terms & Conditions
  • Press

Make-up Brush Guide

March 31, 2021 | Articles | Leave a Comment

Free Stock Image: unsplash.com

Buying make-up brushes can be a daunting task, especially if you’re just starting out or you want to add to your existing collection but don’t really know what brushes you may need, what they’re used for, or what they look like.  This is where a make-up brush guide comes in handy.

There are a few essential brush ‘must haves’ that should be in everyone’s make-up kit. If used correctly, these brushes will help you create flawless, beautifully applied make-up.  They are: powder brush, blush brush, eye shadow brush, blending brush, angled brush, eyeliner brush, mascara wand and a lip brush.

To help you decide which brushes you may want or what you still need to get, here’s a make-up brush guide, showing what each brush looks like, and what it’s used for, and at the end there’s also a guide of other useful make-up tools that you may encounter:
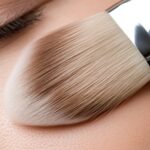
Foundation Brush.  A flat brush usually with two-toned bristles. Can also be round with a flat top. Used for applying liquid or cream foundation, or to smooth out foundation after applying it with your fingers.
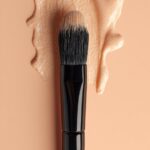


Concealer Brush. A narrow, flat brush with a slightly tapered edge. Used for applying colour corrector and concealer to problem areas.
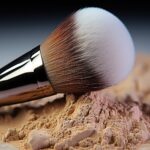


Powder Brush.  A big, soft, rounded brush. Used for applying loose or compact powder.  Gives a more even finish than a puff.
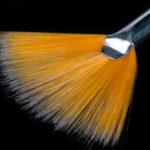


Fan Brush. A flat, light brush with splayed bristles. Used to brush away loose eye shadow or excess powder.
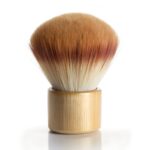


Kabuki Brush. A large brush with wide, round or flat bristles and a short handle. For applying mineral powder or loose powder by using a circular motion to buff it onto your skin. Can also be used to apply liquid foundation.
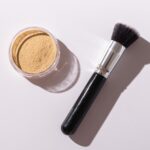


Mineral Powder Brush.  Looks similar to a blush brush, but has a flat top. Used to apply mineral foundation using a circular motion.
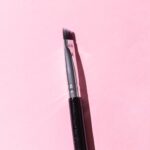


Angled Brush.  A firm, angled brush. Used for
filling in eyebrows with brow powder or eye shadow.  Can also be used to apply gel eyeliner for a thicker line.  Use it to apply a dark brown or charcoal eyeshadow in place of eyeliner for a softer look.
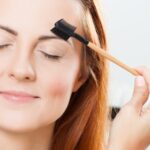


Eyebrow Brush & Eyelash comb.  Narrow row of long, stiff bristles with a comb on the opposite side. The bristled brush is used to groom or brush eyebrows.  The comb is used to remove mascara clumps from eye lashes.
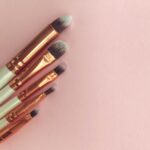


Eyeshadow Brush. A small, soft brush with a slightly rounded or angled tip. Used to apply powder and cream eye shadows.
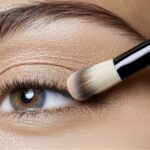


Blending Brush.  Oval shaped brush. Used to blend eye shadows together after applying with an eye shadow brush for a seamless gradient.


Eyeliner Brush. Narrow, pointed tip.  Looks like a small paint brush. Used for applying liquid or gel eyeliner. Wider flat topped brush used for applying powder or eyeshadow as eyeliner.
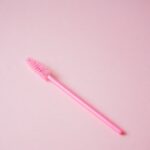


Mascara Brush.  Clean, dry mascara wand. Used for brushing out mascara clumps and separating lashes after mascara has been applied with wand in mascara tube. For more info, see post “Mascara: How to be clump free“.
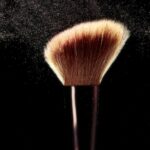


Contouring Brush.  Angled blusher brush. Used for applying a darker blush or contouring powder along the hollow under your cheekbone.  Also used for applying bronzer.
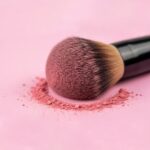


Blush Brush.  Soft, rounded brush, smaller than a powder brush. Used to apply blush to your cheekbones.
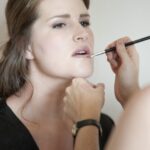


Lipstick Brush.  Small, flat, firm brush with tapered tip, for applying lipstick.


Other useful make-up tools:
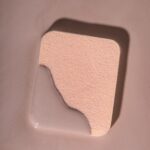

Beauty Blender, Cosmetic sponge or wedge. Used to apply foundation, but will absorb lots of product.  Rather dab the wedge lightly over foundation (if applied with fingers for a foundation brush) to blot any excess.  Use to tidy up under eyes after applying eye shadow, eyeliner or mascara. Can also be used to correct blusher mistakes. See post “Beautiful Blusher”.
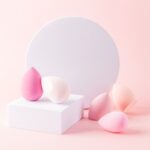


Beauty Blender. Similar to a cosmetic sponge or wedge, but teardrop shaped. Use it damp for applying liquid or cream foundation.
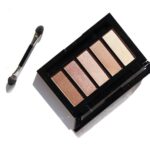


Eyeshadow applicator. Used for smudging eyeliner.  Not recommended for applying eyeshadow, as it absorbs a lot of product and may leave a patchy looking finish.
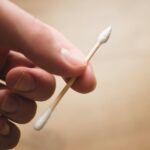


Cotton bud or Q-Tip. For cleaning up smudges or mistakes.  Dip into eye make-up remover and use to clean up smudged eyeliner, mistakes or out-of-place lipstick.
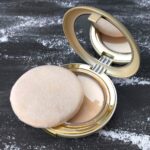


Powder Puff. Pat powder over concealer on blemishes and problem areas, this will set the concealer.  Can be used to apply powder to an oily skin. For more, see post “Powder:  Loose or Pressed?”  A brush is recommended for all over powder application on the face.


Good brushes may be expensive, but if you take good care of them, they can last for many years.  If you’re looking for a great starter set, check out Real Techniques’ Core Collection Set, also be sure to read my next post on How to clean make-up brushes.

I hope you found this make-up brush guide helpful.

Share this:

  • Share on Facebook (Opens in new window) Facebook
  • Share on X (Opens in new window) X
  • Share on Pinterest (Opens in new window) Pinterest
  • Print (Opens in new window) Print

Reader Interactions

Leave a Reply Cancel reply

You must be logged in to post a comment.

ramblingrosenails

💅 By appointment only.
🚫 No under 16s.
Closed on Wednesday & Sunday.
Book online:

Get your skin ready for summer with 25% off all Re Get your skin ready for summer with 25% off all Reniu products by Pure Fiji (including gift boxes and gift baskets).

25% off everything else storewide: 
- all skincare and nail products 
- Jewellery
- Home Decor
- Hair and Bridal accessories

Halloween weekend only (30 & 31 October 2026).

 #savethedate #25offsale #halloweensale
Get your pre-Halloween appointments booked in now! Get your pre-Halloween appointments booked in now! ... And while you're at it, book your pre-Christmas appointments, too.  Spots are filling up fast.

Gel polish manicure with one feature nail per hand = $74

👩‍💻 Book online.
🎁 Gift vouchers available online - use above link.
📍  Mangawhai Heads
📖  By appointment only
🚸  No children under 16 allowed in the salon.
🧴  Strict hygiene routine
🎓  Fully qualified nail tech with 10+ years experience 
🌹  Tranquil location 

 #pumpkinnails #halloweennails #Halloween2026 #halloween2026
Great quality, soft eyeliner and lip liner pencils Great quality, soft eyeliner and lip liner pencils available while stocks last.

Eyeliners $6.95
Lip Liners $7.99

 #eyelinerpencils #liplinerpencils #makeupforsale
Will you be decorating your nails for Halloween? Will you be decorating your nails for Halloween?

Gel polish mani with nail art = $90

👩‍💻 Book online.
🎁 Gift vouchers available online.
📍  Mangawhai Heads
📖  By appointment only
🚸  No children under 16 allowed in the salon.
🧴  Strict hygiene routine
🎓  Fully qualified nail tech with 10+ years experience 
🌹  Tranquil location 

 #HauntedHouseNails #hauntedhousenails #halloweennails #halloweennailart #Halloween2026 #halloween2026
Got thin or uneven lips? Make them look bigger b Got thin or uneven lips? 

Make them look bigger by taking a pencil lip liner in a shade the same colour as the lipstick you intend on wearing (or use a nude shade) and using light, feathery strokes or very tiny circular motions, almost buff the lip liner onto the edge of your thin or uneven lip, right where the natural lip colour and skin colour meet. Ideally, you want to extend the natural lip line colour by about millimetre or two (the width of a sharp lip liner pencil). Keep adding more width until the lip looks fuller but still natural. Rather start small and build the line up slowly instead of having to wipe the liner off and start again each time.

Once you’ve lined both lips, fill them in with the lip liner to create a base for your lipstick. Take a clean, dry lip brush or a cotton bud and soften and blend the lip liner onto your lips so that there are no harsh lines but rather a smooth application of colour.

Apply your lipstick to both lips, preferably with a lipstick brush and blot with a tissue. Apply a second coat of lipstick. 

 #thinlips #unevenlips #lipsticktips
Halloween nails don't have to be witches, cobwebs Halloween nails don't have to be witches, cobwebs or ghosts ... They can be simple polka dots.

Gel polish mani with two feature nails per hand = $78

By appointment only. Book online.

 #halloweennails #polkadots #polkadotnails
Need some 'me time'? Book an appointment online. Need some 'me time'? 

Book an appointment online.

 #nailsbyappointment #mangawhainailtech #mangawhainailsalon #ramblingrosenails
'Howl, Baby, Howl' is a beautiful cinnamon colour 'Howl, Baby, Howl' is a beautiful cinnamon colour brown - perfect if you're wanting a change from nude.

 #cinnamonnails #brownnails #howlbabyhowl
If you've chosen Rambling Rose for a mani or pedi If you've chosen Rambling Rose for a mani or pedi in the past few months, thank you! I feel honoured that you've chosen me to look after your natural nail health. Without you, my small business wouldn't be here - your patronage is much appreciated. 

Don't forget to start booking your November and December appointments ... Spots are starting to fill up. 

 #loyalclients #thankyou #nailsbyappointment
Gloss vs Matte Something as simple as changing th Gloss vs Matte

Something as simple as changing the final top coat from gloss to matte can completely change the look of your usual nail polish colour.  See these pics for a comparison.

Which one do you prefer? 

 #GlossVsMatte #glossvsmatte #MattevsShine #mattevsshine
Follow on Instagram

Copyright © 2026 · Rambling Rose